Have you ever stopped to marvel at just how far we’ve come in the realm of technology? From the invention of the wheel to the advent of the internet, humanity has always been on a quest to push the boundaries of what’s possible. And today, as we stand on the cusp of a new era, the pace of technological innovation has never been more exhilarating.
In this fast-paced digital age, it’s easy to feel overwhelmed by the sheer magnitude of advancements happening all around us. That’s why I’m here to be your guide through the ever-shifting landscape of tech trends. Whether you’re a seasoned tech guru or just dipping your toes into the world of gadgets and gizmos, there’s something here for everyone.
Let’s take a closer look at some of the hottest tech trends that are shaping our future.
5G Revolution: You’ve probably heard about it, but what’s the big deal with 5G? Simply put, it’s super-fast internet that’ll make everything from streaming videos to downloading files lightning quick. Say goodbye to buffering and hello to seamless connectivity!
Smart Home Smarts: Imagine a home where everything is connected and controllable with just a tap on your phone. That’s the magic of smart home tech! From thermostats to light bulbs, you can automate and customize your living space like never before.
AI Everywhere: Artificial intelligence is no longer just science fiction – it’s becoming a part of our everyday lives. From virtual assistants like Siri and Alexa to personalized recommendations on Netflix and Spotify, AI is making our tech smarter and more intuitive.
Electric Dreams: With climate change on everyone’s minds, electric vehicles (EVs) are leading the charge towards a greener future. From sleek electric cars to eco-friendly scooters, the transportation industry is going electric, one vehicle at a time.
Wearable Wonders: Fitness trackers, smartwatches, and even smart glasses – wearable tech is taking over! These nifty gadgets not only track your steps and monitor your health but also keep you connected on the go.
Blockchain Boom: Heard of Bitcoin? Well, blockchain is the technology behind it, and it’s revolutionizing everything from finance to supply chain management. With its secure and transparent nature, blockchain has the potential to transform industries worldwide.
AR and VR Adventures: Ever wanted to step into a virtual world or see digital images overlaid onto the real world? That’s the magic of augmented reality (AR) and virtual reality (VR) tech! From gaming to education, the possibilities are endless.
Cybersecurity Crusaders: With cyber threats on the rise, cybersecurity has never been more important. From protecting your online accounts to safeguarding sensitive data, cybersecurity experts are the heroes keeping our digital world safe and secure.
Health-Tech Innovations: From telemedicine to health-tracking apps, technology is revolutionizing the healthcare industry. With the power of tech, healthcare providers can deliver personalized care and empower patients to take control of their health.
Sustainable Solutions: Tech isn’t just about cool gadgets – it’s also about making the world a better place. From renewable energy solutions to eco-friendly tech products, the tech industry is leading the charge towards a more sustainable future.
These tech trends are just the tip of the iceberg – there’s so much more innovation and excitement to come! So, buckle up and get ready for a thrilling ride into the future of tech. The possibilities are endless, and the future is bright!
Snapchat is a widely used social media platform that enables individuals to share photos, videos, and messages with their acquaintances and followers. Among its various features, one notable feature is the ability to pin specific chats to the top of your chat list to access them easily. Pinning a conversation can prove to be beneficial if you have a group chat or frequently communicate with someone. We will provide you with a step-by-step guide on how to pin someone on Snapchat in 2023 so that you can conveniently access your important conversations.
Luckily, plenty of other Android users have done this, and you can benefit from the wisdom they gleaned from their successes and their Android mistakes.
This guide on how to pin someone on Snapchat Android will help you with everything that revolves around How to pin someone on Snapchat Android 2023.
To pin someone on Snapchat Android you must already be friends with the person you want to pin on Snapchat Android 2023.
Pinning is a way to keep important Snaps and Chats at the top of your Friends page so you can easily find them again. When you pin someone, their profile photo will appear at the top of your Friends page.
You can only pin one Chat or Snap at a time.
Why Can’t I Pin Someone On Snapchat On Android?
There are a few reasons why you might not be able to pin someone on Snapchat on Android.
First, make sure that you have the latest version of the app installed.
If you’re still having trouble, it could be because your phone’s operating system is out of date.
You can check this by going into your phone’s settings and looking for the About Phone section.
How To Pin Someone On Snapchat Android
Below is the easiest step-by-step guide and a video on how to pin someone on Snapchat Android.
Do well to read through this article, as there is other helpful information we have for you on that website.
STEP 1: Open your Snapchat Application
STEP 2: Navigate to your “CHATS” (Using the button left of your snapping button.
STEP 3: Scroll to “the Conversation” or ” the chat” you want to pin.
STEP 4: Long press and Hold the conversation, chat, or your friend that you want to pin.
STEP 5: From the screen that pops up, click on “More”
STEP 6: Then click on “Pin Shortcut to Home Screen”
STEP 7: From the box that will be displayed, click on “Add”
It’s just as simple as that, you can now check your home screen to see the shortcut.
Congratulations!
How To Unpin Someone On Snapchat Using Android
To unpin someone on Snapchat using Android:
First, open the Snapchat app and log in.
Navigate to the chat screen by clicking on the chat button OR you just swipe left.
Then, scroll to the conversation or the person you have pinned.
Long press on that chat.
Click on “chat settings”
Then click on “Unpin Conversation”
That’s just it, you’ve just unpinned that conversation.
Congratulations!
FAQ: How To Pin Someone On Snapchat Android 2023 | How To Unpin Someone On Snapchat Using Android
What Happens When You Pin People on Snapchat
Snapchat is a social media app that allows users to share photos and videos with friends.
You can also add text, filters, and other effects to your snaps.
One of the features of Snapchat is the ability to pin people to your story.
This means that their snaps will always appear at the top of your story, even if you add new snaps later.
Pinning people on Snapchat can be useful if you want to make sure that certain friends always see your story, or if you want to highlight a particular event.
What Does A Red Pin On Snapchat Mean?
A red pin on Snapchat indicates that you have been pinned by that person.
This means that they have added you to their close friend’s list.
When you are on this list, the person who pinned you will see your Snapscore and any new stories you post will appear at the top of their feed.
What does it mean to “pin” a conversation on Snapchat?
Pinning a conversation on Snapchat means keeping it at the top of your chat list so that it is easily accessible.
Can I pin multiple conversations on Snapchat?
Yes, you can pin multiple conversations on Snapchat.
Will the person I have pinned on Snapchat be notified?
No, the person you have pinned on Snapchat will not be notified.
Can I unpin a conversation on Snapchat?
Yes, you can unpin a conversation on Snapchat by long-pressing on the conversation and selecting the “Unpin” option.
Can I change the order of my pinned conversations on Snapchat?
Yes, you can manage your pinned conversations on Snapchat by dragging and dropping them in any order you prefer.
Can I pin a conversation with a group on Snapchat?
Yes, you can pin a conversation with a group on Snapchat.
Is there a limit to the number of conversations I can pin on Snapchat?
No, there is no limit to the number of conversations you can pin on Snapchat.
Can I pin conversations on Snapchat for a limited time period?
No, currently there is no feature available on Snapchat to pin conversations for a limited time period.
Can I pin conversations on Snapchat for both iOS and Android devices?
Yes, you can pin conversations on Snapchat for both iOS and Android devices.
Do I need to update my Snapchat app to pin conversations?
No, pinning conversations is a feature that has been available on Snapchat for some time, so you do not need to update your app to use it.
Conclusion On How To Pin Someone On Snapchat Android 2023
By following the steps above, you should be able to successfully pin someone on Snapchat.
This process may change slightly in future years, but the basic idea will remain the same.
Pinning someone on Snapchat is a great way to keep track of your favorite people and make sure you never miss a Snap from them.
Whether you’re looking for an easier way to manage your friend’s list or just want to increase the chances that they’ll see one of your Snaps, this tutorial has got you covered. Happy snapping.
RECOMMENDATIONS:
How To Create Instagram Memes For More Followers And Engagement
How Can I See My Old Post On Facebook Without Scrolling?
Best Courses for Electricians in Ireland: Electricians play a crucial role in maintaining and installing electrical systems in residential, commercial, and industrial settings. As technology continues to advance, the demand for skilled electricians is only increasing. If you are an electrician in Ireland or looking to become one, there are a variety of courses available to help you develop your skills and knowledge.
Here are 20 of the best courses for electricians in Ireland
City and Guilds 2365 Level 2 and 3 Diploma in Electrical Installations
QQI Level 6 Advanced Certificate in Electrical Services
NICEIC Approved Contractor Scheme
IPAF Powered Access Training Course
17th Edition IEE Wiring Regulations (BS 7671)
PASMA Tower Scaffold Training Course
EAL Level 3 Award in the Requirements for Electrical Installations BS 7671
C&G 2357 Level 3 NVQ in Electrotechnical Services
PAT Testing Training Course
City and Guilds 2330 Level 2 and 3 in Electrotechnical Services
ECS Health and Safety Test
IET 18th Edition Wiring Regulations
EAL Level 4 Higher National Certificate in Electrical and Electronic Engineering
C&G 2377 Portable Appliance Testing
City and Guilds 2356 Level 3 NVQ in Installing Electrotechnical Systems and Equipment
C&G 2391-52 Inspection and Testing
BS 5839 Fire Alarm Systems Training Course
C&G 2394/2395 Inspection, Testing and Certification of Electrical Installations
EAL Level 5 Higher National Diploma in Electrical and Electronic Engineering
These courses offer a range of opportunities for electricians, whether you are just starting out in your career or looking to expand your skills. Each course is designed to meet the specific needs of electricians and provides hands-on experience, theoretical knowledge, and practical skills.
Whether you are interested in safety regulations, electrical installations, or specialized areas like fire alarm systems, there is a course that will meet your needs.
ALSO READ: Best Film Schools In Ireland 2023: Fully Funded Irish Government Scholarships
Here is a brief explanation of each of the 20 courses listed
City and Guilds 2365 Level 2 and 3 Diploma in Electrical Installations
This is a comprehensive course that covers all aspects of electrical installations, including the design, installation, commissioning, and maintenance of electrical systems.
QQI Level 6 Advanced Certificate in Electrical Services
This course is designed for electricians who want to take their skills to the next level. It covers advanced topics in electrical installations, including electrical theory and regulation, installation practices, and electrical testing.
NICEIC Approved Contractor Scheme
This course is designed for electricians who want to become approved contractors with the National Inspection Council for Electrical Installation Contracting (NICEIC). The course covers all aspects of electrical installations, including safety, quality, and best practices.
IPAF Powered Access Training Course
This course is designed for electricians who want to become certified to operate powered access equipment, such as cherry pickers and scissor lifts. The course covers the safe use of powered access equipment, as well as relevant health and safety regulations.
17th Edition IEE Wiring Regulations (BS 7671)
This course covers the 17th edition of the Institute of Electrical Engineers (IEE) Wiring Regulations, which are the UK’s national standard for electrical installations. The course covers the latest electrical safety regulations and best practices for electrical installations.
PASMA Tower Scaffold Training Course
This course is designed for electricians who want to become certified to use tower scaffolds safely. The course covers the safe use of tower scaffolds, as well as relevant health and safety regulations.
EAL Level 3 Award in the Requirements for Electrical Installations BS 7671
This course covers the requirements for electrical installations, including the latest electrical safety regulations and best practices for electrical installations. The course is designed for electricians who want to improve their knowledge of electrical installations.
C&G 2357 Level 3 NVQ in Electrotechnical Services
This course is designed for electricians who want to further their careers by gaining a National Vocational Qualification (NVQ) in electrotechnical services. The course covers all aspects of electrical installations, including safety, quality, and best practices.
PAT Testing Training Course
This course is designed for electricians who want to become certified to perform Portable Appliance Testing (PAT). The course covers the latest regulations and best practices for PAT, as well as the use of PAT testing equipment.
City and Guilds 2330 Level 2 and 3 in Electrotechnical Services
This course covers all aspects of electrical installations, including the design, installation, commissioning, and maintenance of electrical systems. The course is designed for electricians who want to improve their knowledge of electrotechnical services.
ECS Health and Safety Test
This course is designed for electricians who want to become certified to work on construction sites. The course covers relevant health and safety regulations and best practices for working on construction sites.
IET 18th Edition Wiring Regulations
This course covers the 18th edition of the Institution of Engineering and Technology (IET) Wiring Regulations, which are the UK’s national standard for electrical installations. The course covers the latest electrical safety regulations and best practices for electrical installations.
IPAF MEWP for Managers Training Course
This course is designed for electricians who want to become certified to manage the safe use of Mobile Elevating Work Platforms (MEWPs). The course covers the safe use of MEWPs, as well as relevant health and safety regulations.
City and Guilds 2391-52 Inspection and Testing
This course is designed for electricians who want to become certified to perform inspections and tests on electrical installations. The course covers the latest regulations and best practices for inspection and testing, as well as the use of testing equipment.
C&G 2377 Portable Appliance Testing (PAT) Training Course
This course is designed for electricians who want to become certified to perform Portable Appliance Testing (PAT). The course covers the latest regulations and best practices for PAT, as well as the use of PAT testing equipment.
C&G 2382-15 17th Edition IEE Wiring Regulations
This course covers the 17th edition of the Institute of Electrical Engineers (IEE) Wiring Regulations, which are the UK’s national standard for electrical installations. The course covers the latest electrical safety regulations and best practices for electrical installations.
C&G 2394/5 Initial Verification and Certification of Electrical Installations
This course is designed for electricians who want to become certified to perform initial verification and certification of electrical installations. The course covers the latest regulations and best practices for verification and certification, as well as the use of testing equipment.
C&G 2392-10 Fundamentals of Electrical Installations
This course covers the fundamentals of electrical installations, including electrical theory and regulation, installation practices, and electrical testing. The course is designed for electricians who want to improve their knowledge of electrical installations.
C&G 2396 Design and Verification of Electrical Installations
This course is designed for electricians who want to become certified to design and verify electrical installations. The course covers the latest regulations and best practices for design and verification, as well as the use of testing equipment.
If you are an electrician in Ireland or looking to become one, these 20 courses offer a great starting point for developing your skills and knowledge. By taking advantage of these opportunities, you can improve your career prospects and become a more competent, confident, and skilled electrician.
Biggest Headache With Technology Today: There are many people who believe that technology has made life more difficult than it needs to be. Technology is a double-edged sword, it can make day-to-day tasks easier, but it can also create problems that didn’t exist before.
Biggest Headache With Technology Today
Technology has been around for a long time, but it is only in recent years that we have seen it become so prolific in our lives. However, with this proliferation of technology comes a lot of headaches and one of the most prominent sources of headaches today is the fact that there is just too much to keep track of.
Reading through this article, you’ll find that technology has become a major part of just about everyone’s life.
It’s no wonder that it can also be a major pain at times. But don’t worry, because this article will give you the solutions to your biggest headaches with technology today.
What Is The Biggest Technology Headache Today?
There are a number of big technology headaches today. One of the biggest is keeping up with the latest trends. Technology changes so rapidly that it can be hard to keep up, especially if you’re not a tech-savvy person.
Another headache is dealing with technical problems. Whether it’s a problem with your computer, your phone, or your home network, dealing with technical issues can be frustrating and time-consuming.
Finally, another big headache with technology is simply the cost. With new gadgets and devices coming out all the time, it can be expensive to keep up with the latest and greatest.
Top 13 Bad Effects of Modern Technology for Students in Education
How Can We Reduce The Negative Effects Of Technology?
Technology can have a lot of negative effects on our lives, including increasing stress levels and causing sleep deprivation. But there are ways to reduce the negative impact of technology on our lives.
1. Take Breaks From Screens.
Too much time staring at screens can lead to headaches, eye strain, and neck pain. Give your eyes a break by stepping away from screens every 20 minutes or so.
2. Get enough sleep.
A good night’s sleep is essential for overall health, including reducing the negative effects of technology on the brain.
3. Limit Screen Time Before Bed.
The blue light emitted from screens can interfere with sleep, so it’s best to avoid using devices in the hours leading up to bedtime.
4. Be mindful of posture.
Poor posture can lead to muscle strain and pain, so be sure to sit up straight and take breaks from sitting or standing in one position for too long.
5. Exercise regularly.
Exercise releases endorphins that have mood-boosting and stress-reducing effects, which can help offset the negative impacts of technology use.
We are becoming more reliant on machines to do things for us, and in the process, we are losing some of our essential humanity.
We are losing the ability to connect with other people on a deep level, and we are losing touch with the natural world.
The author argues that we need to be careful not to let technology take over our lives completely, or we will lose what makes us truly human.
What Are Some Current Trends In IT?
There are a few current trends in IT that can be difficult to keep up with. The cloud is becoming more popular, which can make data storage and backup more complicated. Mobile devices are also becoming more popular, which can impact how businesses deliver content and applications.
The Unsolved Problems In Technology
Security: Despite the best efforts of security professionals, data breaches continue to occur on a regular basis.
While some of these breaches are due to carelessness or poor security practices on the part of businesses or individuals, many are the result of sophisticated attacks by skilled hackers.
Interoperability: One of the biggest challenges facing technology today is the lack of interoperability between different platforms and devices.
This can make it difficult and time-consuming to transfer data between systems, or even to use different devices and software products together.
Complexity: As technology has become more advanced, it has also become more complex. This can make it difficult for users to understand how to use new products and can lead to errors and frustration.
It can also make it harder for businesses to support and maintain their technology infrastructure.
Cost: The cost of developing and deploying new technology can be prohibitive for many businesses, especially small businesses.
Additionally, the cost of training employees to use new technology can also add up quickly.
Obsolescence: One of the most frustrating aspects of technology is its tendency to become obsolete quickly. This means that businesses and individuals often have to invest in new hardware.
Frequently Asked Questions On Biggest Headache With Technology Today
What’s The Biggest Issue Facing The Tech Industry Today?
The biggest headache with technology today is the rapidly changing landscape. What was popular last year may be completely outdated this year, and it can be tough to keep up.
There’s also the issue of security – with so much of our lives now online, we’re constantly at risk of having our personal information stolen or leaked.
And then there’s the question of ethics, as technology gets more and more advanced, we have to grapple with difficult questions about how far we should go in using it.
What Are The Positive And Negative Impacts Of Technology?
There is no doubt that technology has had a profound impact on our world. It has changed the way we live, work, and play. It has made communication and information sharing easier than ever before.
But with all of the good that technology has brought us, there are also some negative impacts that we have to contend with.
One of the biggest headaches that technology has caused is the proliferation of fake news. With social media being one of the main sources of news for many people, it is very easy for false information to be spread around.
This can lead to people making ill-informed decisions based on inaccurate information.
Another downside to technology is the way it can sometimes isolate us from the people around us.
If we are always looking at our phones or laptops, we might not be paying attention to the people who are actually in the room with us. This can lead to missed opportunities for real human connection.
Overall, technology has had both positive and negative impacts on our world. While it has made our lives easier in many ways, we need to be careful not to let it take over our lives completely.
Biggest Headache With Technology Today
What Are Technological Issues In Business?
Technology has advanced rapidly in recent years, and businesses have had to adapt to keep up. One of the biggest issues businesses face with technology is data security.
With more and more data being stored electronically, it’s becoming increasingly difficult to keep it safe from hackers. Another big issue is managing employee access to company data and systems.
With so many employees working remotely, it can be hard to control who has access to what.
Finally, businesses have to deal with the constant stream of new technology. Keeping up with the latest trends and figuring out how they can be applied to your business can be a challenge.
What Are The Biggest Challenges Facing Online Education Today?
There’s no doubt that technology has revolutionized education, making it more accessible and convenient than ever before. However, with this increased access comes new challenges, particularly when it comes to online education. Here are some of the biggest headaches facing educators today:
Cheating and Plagiarism
With the ease of copying and pasting information from the internet, cheating and plagiarism have become big problems in online education.
It’s easy for students to simply copy and paste someone else’s work and submit it as their own. As a result, educators have to be extra diligent in checking for plagiarism and identifying cheaters.
Technical Issues
From frozen screens to losing connection in the middle of an exam, technical issues can be a major pain for both students and educators alike.
Online education relies heavily on technology, so when something goes wrong it can cause major disruptions. This is especially frustrating for students who are trying to learn and for educators who are trying to teach
Lack of Engagement
It can be difficult to keep students engaged in an online course when they’re not physically present in a classroom setting. Some students might tune out during lectures or fail to complete.
Recommendations On Biggest Headache With Technology Today:
How Can I See My Old Post On Facebook Without Scrolling? 2022(Video)
Conclusion On Biggest Headache With Technology Today
It’s no secret that technology can be a headache at times. Whether it’s your computer crashing or your phone running out of battery, there are always little things that can go wrong.
However, we believe that the biggest headache with technology today is the way it can sometimes disconnect us from the people and things that matter most.
It’s easy to get lost in our screens and forget to appreciate the real world around us. We challenge you to put down your devices and take some time to truly connect with the people and things you love. You might be surprised at how much better you feel.
10 Best Language Learning Apps: Learning a new language can be daunting, but with the help of technology, it doesn’t have to be.
But with so many different language learning apps on the market, it can be difficult to know which one is right for you. This article will introduce you to 10 of the best language learning apps so that you can find the perfect fit for your needs.
What Defines A Language?
There are a few different ways to define a language. One way is to think of language as a tool for communication. This means that language is a system of symbols that can be used to communicate ideas and information.
Another way to think of a language is as a culture. This means that language is more than just a tool for communication. It is also a way of life. A language includes the values, beliefs, and customs of a group of people.
Learning a new language can be a very rewarding experience. It can open up new opportunities and help you to communicate with people from different cultures, and allow you to travel to new places.
There are many different language learning apps available, so it is important to choose one that is right for you. Some things to consider when choosing a language learning app include:
The price
The effectiveness of the app and
The reviews from other users.
Some apps are free, while others charge a monthly fee. Some research has shown that more expensive apps tend to be more effective.
#10 Best Language Learning Apps 2022
Learning a new language can be difficult, but there are a number of great apps that can make the process easier. They are:
1. Memrise
Memrise is a great language learning app for those who want to learn a new language quickly. The app provides users with short, simple lessons that are easy to understand and remember.
Additionally, the app allows users to review the material as often as they need to in order to ensure that they are retaining the information. Anothergreat feature of Memrise is that it offers users the ability to practice their new language with native speakers.
This is a great way to learn proper pronunciation and gain confidence in speaking the new language.
Overall, Memrise is a great choice for those looking for a fast and effective way to learn a new language. The app’s simple lessons and native speaker practice make it an excellent choice for anyone looking to improve their language skills.
Lingualift is a great language learning app for those who want to learn a new language quickly. The app offers a variety of language courses, each of which is designed to help you learn the basics of the language quickly.
Lingualift also offers a number of helpful features, such as flashcards and grammar lessons, that make learning a new language easy and fun.
The app is available for both iPhone and Android devices, and it offers a free trial so you can try it out before you commit to a subscription.
Rosetta Stone is one of the best language learning apps available. It offers a comprehensive approach to language learning, with lessons that cover reading, writing, speaking, and listening. The app also includes a dictionary and grammar guide.
Rosetta Stone is available in over 30 languages, including Spanish, French, German, Italian, and Chinese. The app can be used on your computer, phone, or tablet. It has a monthly subscription fee of $9.99.
If you’re looking for a free language learning app, Duolingo is a great option. It offers courses in over 30 languages, including popular choices like Spanish, French, and German. The app is designed to be fun and engaging, with bite-sized lessons that you can complete at your own pace. You can also practice your speaking skills with native speakers in the Duolingo community.
One of the great things about Duolingo is that it doesn’t require a lot of time commitment. You can complete lessons in just a few minutes, or spend hours if you want to. The app also lets you set goals and track your progress over time. This makes it easy to see how much you’re improving and encourages you to keep going.
VISIT THEIR WEBSITE TO DOWNLOAD APP
5. Mindsnacks
Mindsnacks is a great language learning app for those who want to learn a new language in a fun and interactive way. The app offers a variety of games and activities that help you learn the basics of a new language and it also keeps track of your progress so you can see how you are doing.
Mindsnacks is available for bothiOS and Android devices and it offers a free trial so you can try it out before you commit to a subscription. The app also has a built-in dictionary so you can look up words as you learn them.
6. Busuu
Busuu is one of the best language learning apps. It offers courses in 12 different languages, including Spanish, French, and German. The app uses a variety of methods to help you learn a new language, such as listening to audio clips, reading texts, and writing exercises.
One of the best things about Busuu is that it offers a personalized learning experience. The app adapts to your level of proficiency and provides tailored content to help you improve your skills. You can also set goals and track your progress over time.
Another great feature of Busuu is that it connects you with native speakers of the language you’re trying to learn. This allows you to practice your speaking skills and get feedback from people who are actually fluent in the language.
7. Babbel
Babbel is one of the best language learning apps. It offers a wide range of languages to choose from and it has a variety of features that make learning a new language easy and fun.
For example, the app includes lessons that are specifically designed to teach you common phrases and vocabulary words.
One of the best things about Babbel is that it offers a wide range of languages to choose from. Whether you want to learn French, Spanish, German, or any other language, Babbel has you covered.
You can also choose from a variety of different dialects, so you can learn the language the way it is spoken in your target country.
There are also interactive games and activities that help you practice what you have learned. And if you ever get stuck, you can always ask for help from one of Babbel’s expert language tutors.
This app provides users with a wide range of language learning tools, including audio lessons, phrase books, and flashcards.
TripLingo also offers a unique “language immersion” feature that allows users to hear how words are pronounced in their target language by native speakers.
This feature is particularly useful for those who are trying to learn a new language for travel purposes.
TripLingo is available for both iOS and Android devices and it offers a free trial so you can try out the features before deciding whether or not to purchase the full version of the app.
GET THE APP HERE
9. MosaLingua
MosaLingua is one of the best language learning apps available. It offers a wide range of features to help you learn a new language.
One of the best features of MosaLingua is its spaced repetition system. This system helps you to review words and phrases that you have already learned so that you don’t forget them.
MosaLingua also has a built-in dictionary so that you can look up words that you don’t know. Another great feature of MosaLingua is its progress tracking system.
This system lets you see how well you are doing in your language learning journey. It also motivates you to keep learning by setting goals and giving rewards.
GET THE APP HERE
10. Drops
#Frequently Asked Questions On The Best Language Learning Apps.
What Is The Importance Of Language Learning?
There are many reasons why language learning is important. It can help you to communicate with people from other cultures, understand different points of view and learn about new things.
When you know more than one language, you also have a better chance of getting a job, as many employers are looking for candidates who are bilingual or multilingual.
Language learning can be difficult, but there are many resources available to help you. There are plenty of language learning apps that can make the process easier and more fun.
Some of the best language learning apps provide a variety of features, such as games, quizzes, and audio lessons. They can also be customized to your individual needs and goals.
There are four main stages in the language learning process:
Pre-production:
In this stage, learners are exposed to the new language but cannot yet produce it themselves. They can understand simple phrases and words, but cannot yet speak or write fluently.
Production:
In this stage, learners begin to produce the new language themselves. They can speak and write simple sentences, but their grammar is often not perfect.
Fluency:
In this stage, learners become more fluent in the new language. They can speak and write smoothly and confidently, with few errors.
Mastery:
In this stage, learners have complete mastery of the new language. They can use it effortlessly and accurately in any situation.
What Is The Purpose Of Language?
There are many different reasons why people learn languages. Some people learn languages for practical purposes, such as being able to communicate with people who speak different languages.
Others learn languages for academic reasons, such as being able to read scholarly texts in their original language and also others learn languages for personal reasons, such as being able to connect with people from other cultures.
Whatever the reason for learning a language, there are a number of apps that can help, below is another set of Apps that can help you achieve your goals
Duolingo is a popular app that helps users learn new languages through interactive exercises.
Babbel is another popular app that offers lessons in over 16 different languages. There are also a number of apps that focus on specific aspects of language learning, such as grammar or vocabulary.
However, all of the apps mentioned above are popular choices that can help you learn a new language.
Editor’s Recommendations On Best Language Learning Apps 2022
This is all to know about Best Language learning App as language learning can be a fun and rewarding experience, but it can also be difficult and time-consuming.
Luckily, there are now a number of language learning apps available that can make the process easier and more enjoyable.
How To Clean Drawer Pulls?: In this article, we will be discussing how to clean drawer pulls. Drawer pulls can get pretty dirty over time, and they can be difficult to clean.
However, with a little elbow grease and the right tools, you can get them looking good as new in no time
First, you will need to gather your supplies. You will need a soft cloth, some distilled water, and some gentle soap.
You may also want to use a toothbrush to get into any hard-to-reach areas. Once you have your supplies, start by wetting your cloth with distilled water.
Then, add a few drops of the gentle soap onto the cloth.
Gently rub the cloth over all of the drawers pulls, using circular motions.
Be sure to rinse the cloth frequently so that you don’t leave any soap residue behind.
If there are any stubborn areas that just won’t come clean, you can try using the toothbrush.
Dip the toothbrush in soapy water and gently scrub the area until it is clean.
Once you have cleaned all of the drawer pulls, rinse them off with distilled water to remove any soap residue. Dry them off with a soft cloth and admire.
If your hardware is looking a little dull, don’t worry, there are plenty of ways to clean and polish it until it looks good as new.
Vinegar and baking soda are both great for cleaning metal, so you can start with those.
If your hardware is particularly grimy, you may want to try using a toothbrush or other soft brush to scrub off any grime.
Once the hardware is clean, you’ll want to protect it from future tarnishing.
A clear lacquer or varnish can help with this but be sure to apply it in a well-ventilated area, the fumes can be strong.
You can also try using beeswax or carnauba wax to give the hardware a protective coating.
Finally, if your hardware is looking a little lackluster, you can always buff it up with a polishing cloth. This will give it a nice shine and make it look like new again.
Frequently Asked Questions On How To Clean Drawer Pulls?
How Do You Clean Badly Tarnished Brass?
If your brass drawer pulls are looking a little worse for wear, don’t despair, there are several ways you can clean them up.
For light tarnish, simply wipe the pulls with a soft cloth dampened with water or white vinegar.
If the tarnish is more stubborn, you can make a paste of equal parts salt, flour, and vinegar, and rub it onto the brass with a soft cloth.
Let the paste sit for about 15 minutes before wiping it off and buffing the brass to a shine with a dry cloth.
For a really heavy tarnish, you may need to use a commercial brass cleaner.
Be sure to follow the instructions on the cleaner carefully, as some require that you rinse the pulls afterward with water, while others recommend against it.
Whichever method you use, be sure to dry the pulls thoroughly after cleaning to prevent water spots.
How Do You Clean Brass Drawer Pulls?
Talking about cleaning the pulls themselves and not the drawer, the best way to clean brass drawer pulls is with a mixture of vinegar and water.
Simply mix equal parts vinegar and water in a bowl and use a soft cloth to wipe down the pulls. If they’re particularly dirty, you may need to let the solution sit on the pulls for a minute or two before wiping it off.
You can as well check the video above for clearer explanations.
Can Coke Clean Brass?
Yes, Coca-Cola can clean brass. The acid in the soda will remove the tarnish from the brass.
How To Clean Drawer Pulls?
If your drawer pulls are looking a bit dull, you may be wondering how to clean them so that they look shiny and new again.
Luckily, it’s actually quite easy to do! In this article, we’ll walk you through the steps necessary to get your drawer pulls looking sparkling clean.
How do baking soda and vinegar clean brass?
Baking soda and vinegar are a natural way to clean brass. First, mix one part baking soda with one part vinegar.
Next, apply the mixture to the brass surface and scrub it gently with a soft cloth. Finally, rinse the area with warm water and dry it with a clean towel.
How Does Baking Soda And Vinegar Clean Brass?
Baking soda and vinegar are two of the most commonly used household cleaners. They are also effective at cleaning brass drawer pulls. Brass is a type of metal that can tarnish over time. The acid in the vinegar helps to remove the tarnish from brass. Baking soda is a mild abrasive that can help to clean the surface of the brass.
Does WD 40 Remove Tarnish From Brass?
WD-40 can actually remove tarnish from brass! Just spray a little WD-40 on a clean cloth and rub the brass in a circular motion.
The tarnish will disappear and your brass will shine like new!
How Does Boiling Vinegar Clean Brass?
If you’re looking for an easy and effective way to clean brass drawer pulls, boiling vinegar is a great option.
Simply fill a pot with vinegar and place your brass drawer pulls in it. Boil for about 10 minutes, then remove and let cool. Your drawer pulls will be shiny and new-looking in no time.
Does Vinegar Damage Metal?
No, vinegar does not damage the metal. In fact, vinegar is often used as a natural cleaning agent for metal surfaces. If your drawer pulls are made of metal, you can safely clean them with vinegar.
One of the most common questions we get asked is whether or not vinegar is effective for cleaning drawer pulls.
The answer is yes and no. Vinegar is a great natural cleaner and can be used on most surfaces, but there are a few exceptions.
One exception is granite. Granite is a porous material and vinegar can actually stain it. Another exception is anything made of brass. Brass can tarnish when exposed to vinegar.
So, if you have brass drawer pulls, you’ll want to use a different cleaner.
What Causes Brass To Tarnish?
There are a few things that can cause the brass to tarnish. The most common culprit is exposure to the air, which causes a chemical reaction that creates a patina on the surface of the metal. Other things that can cause the brass to tarnish include pollutants in the air, moisture, and even fingerprints.
How Do You Keep Brass Shiny?
There are a few ways to keep them shiny. You can use brass polish or a lemon and salt mixture. First, clean the pulls with soapy water.
Then, apply the polish or lemon and salt mixture with a soft cloth. Rub in a circular motion until the desired shine is achieved.
How to Tag Everyone in a Facebook Group:When you’re the admin of a Facebook group, it can be tricky to figure out how to tag everyone in the group. This guide will help you learn how to tag everyone in your Facebook group photo, as well as tag people who are members of your Facebook group but aren’t in the picture. It’s easy to do, so try out the steps below on your next Facebookgroup photo.
Tagging everyone in your Facebook group can seem like an insurmountable task if you don’t know how to do it.
To make it easier, this guide will walk you through each step of tagging everyone in your Facebook group using Facebook Messenger and the mobile app.
Before we start, it’s important to note that this guide assumes that you are the admin of the Facebook group and have permission to use Messenger and add or remove group members.
What Is Tagging?
When you want everyone in the group to be notified about something, you tag them with an @ symbol. To tag someone, type their name and put an at sign (@) before it.
For example, if I wanted my uncle and aunt to see what I posted on our family’s Facebook group, I would have typed @jamesgrant before my message.
Tagging lets people who are not connected know that the post is for them. You can also use tags to call attention to posts from other members of your network without commenting.
Tagging also provides an easy way for members of your network to quickly find posts they might have missed or new posts by old friends they’re catching up with.
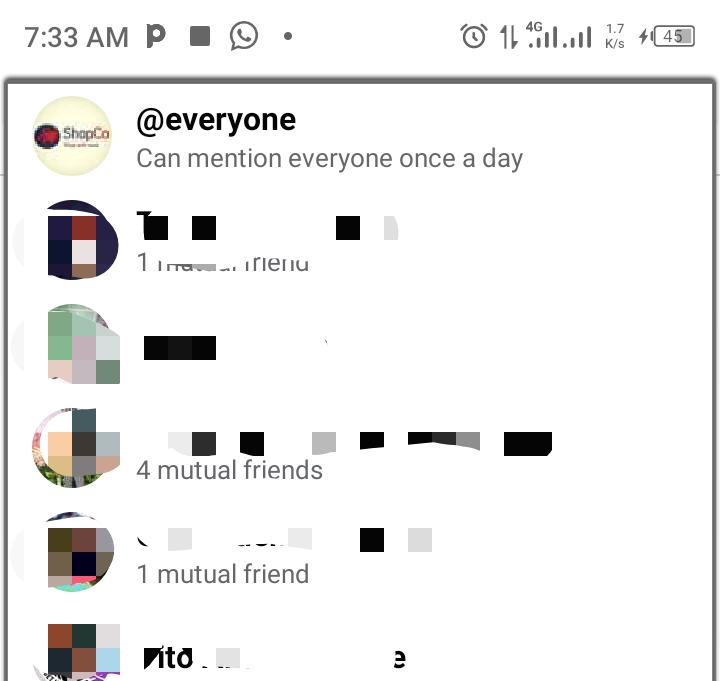
When you start a message with @everyone, all participants in the chat will be notified. @everyone is perfect for group reminders, impromptu get-togethers, or when you need to gather the brain trust to crowdsource an answer to a time-sensitive question. This way, your message gets maximum exposure, and nobody misses out.
How Do I Tag Someone?
You can add tags when you create a post or comment by typing the person’s name and adding it followed by @.
How To Tag Everyone In A Facebook Group
Tagging everyone at once in a Facebook group is a new feature that is meant only for group admins or owners. If you are not an admin or group owner, you can only tag one person at once and can’t tag everyone at once.
To Tag, Everyone in a Facebook Group at once follows the following steps.
Step 1: on your post, type in “@”, this will bring up “@everyone” and a list of all the group members
Step 2: Choose “@everyone”
It’s just as simple as that.
Why Doesn’t @everyone Work On Facebook Group?
If you need help figuring out how to tag everyone in a Facebook group, this is the post for you.
First, there are four different ways you can use when tagging people on your Facebook group page: using the @everyone tag, using individual tags, using the @list tag, and finally using both the @everyone and @list tags.
Tagging everyone can be difficult, but it’s worth the effort if you want to be able to find them all at a later date.
It also ensures that people don’t get left out of the conversation when they may have valuable insight. To tag everyone in a Facebook group, you need to follow the steps above or watch the video above.
Reasons Why You Wouldn’t Want To Tag People
Tagging someone can give them spam notifications.
Tagging too many people makes it difficult for everyone to view updates on the group page.
Facebook automatically recognizes some words, so you don’t need to tag an individual specifically for them to see the post.
Can I Tag All Group Members In A Facebook Group?
The short answer is yes. You can tag all group members by following the steps already shown in the video above.
Now, if you are in a group and want to get the attention of everyone else in that group for one of your posts, all you have to do is comment @everyone, this only works out if you are an admin in that group.
Using that tag will then send a notification to everyone in the group that they have been “mentioned,” by you.
Why Can’t I Tag Group Members On Facebook?
On Facebook, you are only able to tag the administrator of the group and members who have elected their profile as Public.
Members who have their privacy settings set as Friends or Only Me will not be visible on your post when tagged.
This means that you need to either update the privacy settings for those people or add them as an admin so they can modify their own profile visibility.
FAQ On How to Tag Everyone in a Facebook Group
Why Can’t I Tag Everyone In My Facebook Group 2022
There is no way to tag everyone at once unless you are a group admin, so you will need to tag each person individually. Tagging everyone at once is a Facebook feature that is entitled to only group admins.
You can either type their name and hit enter or click on their name in the list of members.
Once you have tagged them, they will then receive a notification that they were tagged and can see who else was tagged.
If someone has been tagged more than once, they will only be notified of the latest tag.
Do I Have To Be Tagged Back?
When someone tags you in a Facebook group, it doesn’t mean that you have to tag them back.
If you’re too busy or don’t know the person well enough, feel free to politely decline the invitation.
Sometimes this can be avoided by not tagging people at all or by adding people when they’ve accepted the invite.
Either way, just remember that being tagged into a group isn’t an invitation for instant interaction on social media platforms, so be sure that you are comfortable with your response before you do anything else.
To change your tag settings on Facebook, you need to follow the following steps:
Step 1: Scroll to the bottom of Facebook.
Step 2: Tap Settings & Privacy.
Step 3: Scroll down to Audience and Visibility and tap Profile and Tagging.
Step 4: Tap who can see posts you’re tagged in on your profile.
Step 5: Select the audience of people (such as Friends) that you’d like to be able to see the posts you’ve been tagged in.
Closing Thoughts On How to Tag Everyone in a Facebook Group 2022
One of the quickest ways to make sure you’re not tagging the wrong person is by simply typing the person’s name into a Facebook search and seeing if they show up.
I’ve found that this has always been enough, but it might depend on how many people are in your group or where your group lives.
How To Clear Instagram Cache On IPhone, Android: Quick and Easy Steps
How to Clear Instagram Cache on iPhone Easy steps to be followed by everyone. Follow these steps to learn How To Clear Instagram Cache On iPhone (All Versions). First of all, open the Settings application on your device and select Instagram. Then, select Storage & iCloud Usage and then finally Clear Storage or Clear Cached Data depending on your version of the app.
How To Clear Instagram Cache On iPhone
Clearing cache on your iPhone can free up some much-needed storage space. You probably know how to clear your browser’s cache, but did you know you can clear your cache in apps like Instagram too?
https://youtu.be/eKoz6xCVp90
This feature is usually hidden in settings under a long list of options, but here’s how to find it.
Scroll down and tap Cached Data, Delete or Cancel (If you want to save) Wait for confirmation that all data has been cleared and that should be it
What Is An Instagram Cache?
An Instagram cache is your copy of content that has been uploaded to your account.
If you’re using a web-based platform, such as Hootsuite or Sprout Social, to manage your social media accounts, you won’t see any updates in your feed until you refresh it manually.
This isn’t as convenient as being able to check for new posts at any time on your phone, but it does save space if you don’t want Instagram eating up all of your free memory.
Clearing an Instagram cache means having an actual copy of every single post in chronological order. The app will store these pictures on your device so you can access them whenever you need to.
The only downside is that clearing your cache could use up some storage space, which might be worth it if you need more room for other things like music or photos.
This is a very common issue with a lot of users out there. You might be having issues with your camera or your phone will get slower and slower over time, but it’s important to clear your cache every once in a while.
When you have thousands of images saved on your phone, it can slow down other apps as well as affect your device overall.
This is a quick and easy fix that will help extend your battery life by quite a bit, so if you want to learn how to clear the Instagram cache on Android then keep reading!
Clearing cache often doesn’t require any special knowledge, but it does take some time so plan accordingly before getting started. Make sure you follow these steps exactly to avoid messing anything up!
These are not difficult steps to follow, just make sure you do them in order. The first thing we need to do is go into our settings menu.
From here we need to select storage from our settings menu on our iPhone or iPad and scroll all the way down until we see Cached Data at which point we tap that option and select Clear Cached Data for each app individually until all of them are cleared.
Now head back into your Instagram app and navigate through your photos one more time. Once you have gone through all of them, simply exit out of Instagram like normal when finished browsing.
If you followed these steps correctly then everything should be working fine now with no problems whatsoever.
How To Clear Instagram cache on Samsung
Samsung devices run on an Android-based operating system, which means you can clear your cache in a manner similar to how you would on an Android device.
Unlike iOS, however, you don’t have to launch any apps to clear your cache on Samsung. Instead, you will need to follow the following simple steps.
Open your phone’s settings app. You can find it in your all apps list or via your notification panel (if you have one).
Navigate to storage, then tap on it.
Next, select Internal storage.
Tap on Downloaded, then scroll down until you see a list of apps.
Tap on Instagram. A page will pop up with details about all of your Instagram pictures and videos. Select everything you want to clear.
Tap Storage usage at the bottom of the screen, then taps Clear. An option will appear that says something like Clear cache? Make sure it is checked; if it is not, then check it!
How To Clear Instagram cache on laptop
Before we move on to how to clear the cache on your phone, let’s first talk about clearing the cache on a computer.
Now you might be thinking, ‘what in heaven is an Instagram cache?’ As mentioned before, an Instagram cache is temporary files that are used for smoother viewing.
By clearing these files you will no longer be re-downloading content you have already seen, as well as increasing how quickly your browsing experience loads.
Here’s how to do it:
Visit your profile by clicking on your username (located at the top right of any screen).
Click on settings from within your profile page.
Select Account from within settings (it should be listed under Instagram account).
Select Clear Storage from within the Account. Your Instagram cache has now been cleared!
How To Clear Instagram cache on iPhone/iPad:
For those of you who prefer a hands-on approach, here’s how to clear cache using an iPhone or iPad:
Go into Settings by tapping Settings in the bottom menu bar.
Scroll down until you see Instagram and tap it once so that its blue icon turns white with a checkmark next to it.
This means that settings are being saved and applied immediately.
Frequently Asked Questions On How To Clear Instagram Cache On IPhone, Android 2022
How Do I Update My Instagram App?
First off, if you haven’t yet updated your Instagram app, be sure to do so. The easiest way to do so is through an app update from your iPhone or iPad’s App Store.
If you don’t see an option for updating within your current app version, be sure that you have enough space on your device (usually 2GB of free space is sufficient) and try again.
If after a couple of attempts there are still no updates available to you in-app, go ahead and delete and re-install it using iTunes instead.
This will ensure that all updates are downloaded correctly when next connecting to wifi.
It should also be noted that while iOS users can usually just tap update and wait for their phone to download and install new versions automatically, Android users may need to manually go into their settings menu > apps > Instagram > storage > clear cache.
This should clear up any issues with caching or loading images but if not, try restarting your phone first before going into storage options.
You may also want to check out our guide on how to fix other common Instagram problems!
There’s nothing wrong with my Instagram!: It’s important not to panic over these things too much though, Instagram has been known to cause some issues from time to time but they’re typically fairly minor ones that are quickly resolved by following these steps above.
If you’ve tried all of them and your app is still acting up, head on over to Twitter or Facebook for a bit (or come back here!) and try again later.
If you continue having problems, it might be worth trying another app for a bit like Snapchat or Flickr until it sorts itself out, but if so, don’t forget to come back here when you’re done!
Why Is The Repost Option Not Working?
This is one of many issues that users often run into when using any social media app. The best way to figure out what’s going on is to take a quick look at your settings.
Most of these apps have separate tabs for managing your profile/feed as well as other aspects, such as caching or profiles you’ve already liked.
If you have a lot of followers, it might be time to clean things up; make sure there aren’t any old profiles stuck in your repost tab that you don’t need anymore.
You can also try clearing your cache (if applicable) and logging out of Instagram before logging back in again.
While none of these fixes are guaranteed to work, they’re worth trying if you want to give yourself a fresh start with your feed.
If all else fails, simply delete and reinstall Instagram from your device but be warned that doing so will reset your progress.
It’s always a good idea to create backups of your data beforehand! Once you’ve successfully cleared your cache, use our guide to get started.
How Do I Enable Resharing Of My Stories?
In order to reshare a story, you must be following both accounts involved in posting it.
If you would like to reshare your own stories, you can do so by turning on post notifications for your profile.
However, if you want to share someone else’s photo from their profile or a public page, tap views original and then tap reshare to add it to your feed.
Unfortunately, there is no way to request permission for someone else’s photo through Instagram’s app at this time.
The only option is to message them directly and ask nicely!
Other Ways To Get More Out Of Instagram Stories:
Add filters, stickers, text, and location tags; watch Stories with other people using Direct; capture video from your phone’s camera roll; use Boomerang as a moving gif (and send gifs); save your stories to your camera roll; have friends comment or tag each other within stories.
You can also delete posts that aren’t performing well, just hold down on them until they wiggle, then select delete post.
Keep in mind that removing a story will not affect its views after its first 24 hours on Instagram.
It will remain visible during that period even if you remove it but once 24 hours pass since posting it will disappear forever!
How Do I Repost A Question On My Instagram Story?
Reposting your own story is easy. When you’re in your story, swipe up to get your camera ready for a new post.
Tap Repost, and you’ll be able to choose from one of your past posts or from someone else’s.
You can also repost from someone else’s story by tapping their name while they’re in your feed or their picture while they’re in your stories.
This feature was rolled out to everyone over two years ago with iOS 10.0, so there shouldn’t be any reason why you can’t do it if that version is available on your device.
If you’re running an older version of iOS, then you might have some trouble getting it to work properly. In that case, you should probably update your operating system as soon as possible since doing so will allow many other features to work properly as well.
If all else fails, then we recommend trying a third-party app like Instagrabber Pro instead. It doesn’t offer quite as many features as Instagram does (like filters), but it will at least let you repost anything that has been posted within 24 hours.
Apps Like Syncios
If you are using an iPhone, there are a couple of ways that you can clear up space. The first is to delete old messages from your WhatsApp account.
You have probably received a lot of pictures from people and deleting these will free up some storage space.
You can also move apps off of your phone and back on when you need them by simply downloading them again when needed.
The most efficient way to clear up space, however, is to download an app like Syncios on Android or iFunBox on iPhone. These tools allow you to move information off of your phone without erasing it entirely; apps like Google Photos do something similar with images as well.
There are several other useful apps out there that let you clean your device up with ease. Just make sure you’re always backing up important files before moving anything around!
Conclusion On How To Clear Instagram Cache On IPhone, Android
The best tip for cleaning out your cache on Android or iOS devices is to not overdo it. If you go overboard, you could end up losing data that you didn’t mean to lose and not being able to recover it if you don’t know what steps to take.
We suggest only going through one step at a time (so if one step doesn’t work, then try another). You’ll be surprised at how much space clearing your cache actually frees up!
Important Tips To Remember While Using Syncios To Delete/Clear Instagram Cache
If you want to clear your cache for all accounts, follow these steps. If you just want to delete a specific account’s cache, skip ahead to Step 3.
Step 1: Navigate to Settings > Apps & Notifications > Instagram, then tap on it.
If you don’t see an Instagram app, your phone might not have it installed or configured correctly.
Once selected, go back to one screen to get your list of Accounts (Settings > Accounts).
Step 2: Tap on each account and select Storage (so we can see which account is taking up space), then tap on Storage again when you’re in Account Management mode. This will show you how much space that particular account is using.
Step 3: Choose which account(s) you’d like to remove their cache from by selecting Delete Cache, then confirm by tapping Delete in the upper right corner of your screen.
You’ll be warned that deleting an Instagram cache may cause performance issues with your device; however, if things are running smoothly after removing a single Instagram cache, there shouldn’t be any problems with removing them all at once.
Once deleted, press Back twice until you’re out of settings and back on your home screen! Your Instagram caches should now be cleared out!
However, if they haven’t been cleared yet, give it some time as sometimes it takes longer than usual to complete depending on how many caches were stored on your device. Now you know how to use Syncios to delete/clear the Instagram cache on iPhone/iPad/Android.
How To Close Skrill Account Permanently In 2022: Since its founding in 2001, Skrill, originally known as Moneybookers, has grown to become one of the most popular e-wallet systems in the world, serving millions of users in over 200 countries.
Skrill is regarded as one of the best international payment processing systems accessible. People all across the world use it to transmit money quickly, conveniently, and securely.
You can close your Skrill Account if you’ve decided that Skrill isn’t suited for you, whether for personal or business reasons. These are the steps you must follow if you want to permanently close your Skrill account.
What Is Skrill?
Skrill is an online payment service, also known as Moneybookers
owned by Skrill Limited. It is one of many systems that can be used for transferring money between individuals over the Internet.
The service allows users to store money on their accounts and transfer it between third parties anywhere in the world at any time.
You must first create an account with a system like Skrill in order to use it. Once you’ve done that, you’ll be given a username and password to use to log into your account and make transactions.
A Skrill account is a virtual wallet that allows you to store, receive, and send money over the internet. To open an account, you do not need to give your bank account or credit card information. Instead, you’ll create a username and password that you’ll use to log in every time.
From here, you can purchase a variety of prepaid MasterCard debit cards that work with your account so that you can make purchases directly from your balance and cash out whenever it suits you. There are also other ways to spend your money including:
To delete your Skrill account, simply head over to their contact us page.
Log into your profile and fill out a support ticket. In most cases, all you will need is proof of identification, but sometimes it may be necessary for you to contact them on the phone.
Please note that it can take several days like 1-7 days depending on how many requests they receive at any given time.
How Does Skrill Work?
You can send money to someone else’s Skrill account using your credit card or a direct bank transfer. Withdrawals can be made via electronic funds transfer (EFT) or cash deposits at any of Skrill’s international partner banks.
It’s also possible to transfer money from your PayPal account to your Skrill wallet. You should never have more money in your PayPal account than you need for immediate usage, as with any other payment service.
Consider transferring some of it to your Skrill account while retaining the rest in your checking or savings account. This ensures that if something goes wrong with PayPal or if you lose access to it, you won’t lose access to your money.
So, if you wish to permanently shut your Skrill account, the simplest approach to ensure that it does not happen is to just stop using it. If that isn’t possible due to a variety of factors,
Also, if you want to leave your Skrill account active but not use it any longer, you can.
At any moment, you can easily disable auto-renewal on any of your accounts. Simply log into PayPal or contact them via their online chat system to tell them what you want to be done with each of your accounts.
Skrill Products
Skrill products include:
online and mobile payments
prepaid cards
bill payment
fast bank transfers etc.
But they currently operate a number of product brands like:
Neteller
Interswitch and
Paysafe.
Each brand has its own distinct character with a strong point of view on how it enables people around the world to do business together online or face-to-face. Whereas the two main brands are :
Neteller and
Skrill
These brands are synonymous with a simple, secure way for individuals and organizations to manage their financial needs online or through mobile devices.
We have become one of Europe’s major independent e-money issuers by processing billions of transactions every year over our global network, based on our 20-year experience as one of Europe’s leading e-payment service providers.
All of these solutions are designed to make managing your money as simple as possible and to give you complete control over your finances whether you’re using a computer or a mobile device.
How TO To Withdraw Money From Skrill
To withdraw money from Skrill, go to the top of your dashboard and click Withdraw Money. This will bring up a menu with a list of all the currencies that are available.
It’s as simple as clicking on the option and selecting your withdrawal amount. Depending on your region, your money will be distributed via EFT/wire transfer and should arrive at its destination within two business days of being sent from Skrill.
However, you should. Keep in mind that depending on how much information you tell us about yourself, some withdrawals may take more than two days to process, so double-check all of your details before submitting an application.
How To Close Skrill Account Permanently
What Is The Skrill Withdrawal Limit?
The withdrawal limit for your account is $2,000 per 24-hour period or $4,000 per calendar month. The withdrawal limit is calculated based on how much of your deposit balance you are withdrawing. For example:
You can withdraw up to a total of GBP 10,000 or equivalent per week into your Skrill Account. This limit applies across all currencies.
If you need more than that we have been advised that it is possible though not guaranteed that you can increase your withdrawal limit by contacting customer services.
You may be required to provide documentation proving your identity and address.
To do so you will need your Passport/National ID card plus a recent utility bill or bank statement addressed to you at your current home address. However, please note it may take up to 48 hours for us to review any changes made until then there will be no effect on transaction processing times.
There are also some limits on how much you can send using the Skrill service:
USD 1,500 per day maximum
USD 25,000 per month maximum.
There are also limits based on what currency you want to transfer funds out of your Skrill Account:
USD 5,000 per day maximum
USD 50,000 per month maximum.
How To Permanently Delete A Skrill account.
To delete your Skrill account, simply head over to their contact us page.
Log into your profile and fill out a support ticket. In most cases, all you will need is proof of identification, but sometimes it may be necessary for you to contact them on the phone.
Please note that it can take several days like 1-7 days depending on how many requests they receive at any given time.
Why Do People Close Their Skrill Accounts?
There are many reasons why people do want to close their Skrill account, and most of them aren’t worth thinking about. Here are the 20 reasons why people do want to close their Skrill account:
They can no longer create new accounts
It is too late to get a refunds
They can no longer send money to family members
They can no longer buy things online
They can no longer use prepaid cards
Their funds could be frozen
Transactions could be delayed
Funds could be lost
Fees could increase
Customer service hours could change
Fees could become more expensive
Their cards might stop working
They might lose access to their card
Card fees could increase
Cards might stop being accepted
Fees might increase
The company might change its name
Company headquarters might move
The company might go bankruptcy
After 2022, you won’t be able to receive payments from customers. The reasons above are many reasons why people do want to close their Skrill account before 2022.
Is Skrill Safer Than Paypal?
PayPal is a very popular payment method and many businesses rely on PayPal for sales. The issue with PayPal is that it’s linked directly to your bank account.
If your PayPal account gets hacked or if you click on a malicious link, then thieves can take everything from you including money that was sitting in your bank account.
To keep your accounts safe, we recommend transferring money into separate bank accounts or even cash.
When buying things online, use a credit card so you can dispute fraud. So Be careful of banking apps; they’re more prone to hacks than desktop computers.
Remember: Your number one priority is keeping hackers out of your accounts. So don’t forget to change passwords regularly and enable two-factor authentication whenever possible.
Also, be sure to have anti-virus software installed on all devices connected to an internet connection. It’s not foolproof protection, but it does help reduce risk.
To further protect yourself against theft of your personal information, avoid using public WiFi hotspots like those at cafes and libraries unless absolutely necessary.
And never download files from unknown sources as these could contain malware designed specifically to steal data from you.
Skrill Account Terms of Use – How To Close Skrill Account Permanently
FAQ – How To Close Skrill Account Permanently 2022
Which Country Can Use Skrill?
You must be from one of these countries before you can access Skrill:
Austria
Australia
Belgium
Brazil
Canada
China (mainland)
France
Germany
Hong Kong (SAR China)
India
Indonesia
Italy
Japan
Malaysia
Mexico
Netherlands
Portugal
Russia.
Singapore
United Kingdom
The United States of America.
However, using skrill might be a big risk for you because Skrill is not available in all countries. Some Countries banned it so please check carefully before using it. It’s better to buy bitcoins with a credit card or PayPal with a small amount of money instead of buying bitcoins with skrill.
Because when you buy Bitcoins with skrill it will cost more than $100 per bitcoin, In order to secure your account always enable 2FA security on the Skrill website before buying bitcoins online
Always remember never to give anyone access to your private key because if someone gets access then he can steal all your funds without giving you any warning or chance to recover them again.
Can You Reopen A Closed Skrill Account?
You will be unable to access your Skrill account once it has been closed. Our customer care staff will also send you an email verifying that your account has been terminated and that all pending activity on your account has been canceled.
If you decide to reopen a closed account later, keep in mind that an un-canceled transaction cannot be reversed once it has been posted. If you close your wallet with $100 in it and then decide to use Skrill again a year later, only $99 will be left in your wallet when you reactivate it.
This is due to the fact that we employ a third-party payment processor for all transactions, which means we may not be able to cancel or refund transactions that have already been processed. They’re final after they’ve been posted.
Make sure you don’t leave any pending transactions behind while canceling your account to prevent losing money.
Can I Transfer From Skrill To Paypal?
Yes, you can; From your Skrill wallet
Click on Withdraw Funds.
Under Skrill Withdrawal,
select your withdrawal method and confirm your details.
Then Enter either a Paypal email address or other bank account details to get started.
But If you’re transferring within Europe, you will need to enter additional information such as IBAN and BIC codes. It may take up to 2 business days for funds to be transferred into your Paypal account,
In case there are any pending transactions, check on your pending withdrawals:
Go to My Transactions in My Skrill Account.
Transferring money between Skrill and Paypal accounts is completely free of charge.
When withdrawing funds via bank transfer, keep in mind that it may take up to 3-5 working days for the funds to show in your designated bank account. Bank transfers can only be conducted between European nations.
When using their network of ATMs across Europe, several banks impose a fee when withdrawing money from their branches/ATMs.
How Long Does It take To Withdraw From Skrill?
When you request a withdrawal from your Skrill account, it can take up to two business days for your funds to reach your bank. That said, most requests are processed within one business day. You will receive an email confirmation once your request has been processed by our support team.
Before making a withdrawal, log into your Skrill account and confirm that you have an adequate balance on hand to ensure that we received your request.
If you run out of money, simply deposit more into your bank account before requesting another withdrawal. It’s also worth mentioning that bitcoin withdrawals might take up to five days to complete, regardless of the time of year.
This is due to the fact that before a blockchain transaction can be completed, it must be confirmed by network miners.
Transaction times will be shorter than usual if there aren’t many transactions going on at any particular time.
However, if a large number of transactions are conducted at the same time, transaction times will be significantly slowed.
As always, keep a watch out for notifications from us verifying that your withdrawal was successfully handled.
How Do I Remove My Card From Skrill?
Log in to your Skrill Account and hover over Wallet on top of your screen.
Choose Skrill Visa card or Skrill Mastercard.
Click on My Cards.
Click on Cancel my card.
Next click Edit details for whichever card you want to be canceled (you can only cancel one at a time
That’s all there is to know as It may take up to 10 working days for your card to be returned.
Conclusion On How To Close Skrill Account Permanently 2022.
I hope this article really solved your problem and you enjoyed every part of this article.
We hope to see you back to our website again.
Recommendations On How To Close Skrill Account Permanently:
How To Create A Shortcut On Snapchat 2023, How do I delete my created shortcuts? Snapchat shortcuts not showing up 2023
If you’re using the latest version of Snapchat on Android, it can be tricky to remember how to create a shortcut on Snapchat since the button combination changed from the previous version.
How To Create A Shortcut On Snapchat
If you have an older phone or just are having trouble remembering, this guide will show you exactly how to create a shortcut on Snapchat 2023.
We shared many different ways you can do this, just go through it all and know the one that can help you.
The video below explains both how to make a shortcut on Snapchat and how to delete a created shortcuts?
In order to add a shortcut to your phone you need to go into:
Settings > Apps > Snapchat and tap Force Stop so that Snapchat will stop running in memory.
Next, hold down your finger over where it says Snapchat until all of your apps start jiggling around.
From here select Create Shortcut at the bottom right corner of your screen.
This will open up a new page with three options: Home Screen, Lock Screen, and App Drawer.
Select whichever one you want to use as your shortcut and Snapchat will automatically create it for you.
You can now drag it wherever you want on your device and double-click on it whenever you want to open Snapchat again.
Snapchat shortcuts not showing up 2023
This is because some of them are region-specific. You’ll have to change your location and log back into your account. Open Snapchat and go to Settings > Manage Account > Add Services.
From there, you can change your location and log back into your account. Once you’ve done that, you should be able to see all of your new Snapchat shortcuts once again.
If you’re using one of these older versions of Android, you might not be able to use some or all of your app shortcuts.
If your phone is running Marshmallow and below, be sure that you have updated to at least version 6.0.0 of Snapchat and that you haven’t already reached your app-shortcut limit (for some phones, it’s three total shortcuts, while others allow up to five).
It’s also possible that your manufacturer customized the look and feel of Android with its own launcher, in which case we’d recommend looking into ways for using App Shortcuts for launchers other than Nova Launcher.
Why can’t I create a shortcut on Snapchat?
The ability to create shortcuts has been available since 2011, however, not everyone can access it.
According to Snapchat, there are two reasons that you may not be able to view your shortcuts:
either you don’t have any set up OR you are using an older version of Android that doesn’t support them.
If either of these is true, there is nothing more that you can do, and may be frustrated by how difficult it is.
However, if you are on an updated version of Android (Android 4.4 KitKat and above) then read on for how to get around Snapchat’s restrictions.
We shared many different ways you can do this, just go through it all and know the one that can help you.
How do I delete my created shortcuts?
This question has been answered by the first video in this article, so you can scroll up to see the first video under the heading ‘How To Create Shortcuts On Snapchat’ so as to get this issue solved.
Once again go back into Settings > Apps > Snapchat but instead of tapping Force Stop tap Clear Cache instead.
This clears out all data stored by Snapchat but also deletes any shortcuts that were created previously.
To remove just one shortcut simply long press on its icon until they all start jiggling around again then hit Delete next to whichever one you no longer want to be displayed.
How to create a shortcut on Snapchat 2023
After you follow a couple of people, how do you quickly get back to them? It can be kind of annoying if you have to scroll through your contacts or look at your streaks.
I’ll show you how easy it is to create your own shortcuts. All you need is 10 seconds and one tap per day (5 taps total).
Here’s how I did it:
1) Open Snapchat
2) Snap or take a picture
3) Click on ‘Send To’
4) Tap on the search button above
5) Then select ‘Create Shortcut’ under the search button
6) Tap on ‘Choose Emoji’ above and choose your desired emoji
7) Select your friends
8) And finally tap on ‘Create Shortcut’
That’s it, you’re done.
From now on, whenever you open up Snapchat and swipe right until you see Add Friends, all of your shortcuts will appear.
You can also add multiple people by tapping & holding down on another shortcut.
Here’s what I’ve noticed so far: -You don’t need to press & hold anymore; just tap anywhere on a shortcut and it’ll bring up that contact, Instead of creating shortcuts from within your friend’s list, Snapchat created two new buttons inside groups and stories.
When you’re looking at group stories, swipe left until you see Add People and Create Shortcut. To delete a shortcut, open it and then press X.
In order for you and your friends to add each other as contacts, all of you need to have added each other’s Snapchat user names from your contact list. (To find out your username, open Snapchat and go to Me. Your username is listed under Name.)
Don’t worry about adding too many friends: there’s no limit. The only thing that can happen is that you may have difficulty finding someone when you’re sending snaps.
If that’s an issue, get into the habit of looking up people by their usernames in your contact list before attempting to snap them, or try searching their names on social media.
Another thing: it helps if everyone using Snap has added one another as contacts. even if they just ignore all messages! That way, it will be easier to find each other later on.
What is a snap streak?
A snap streak is how many days you’ve been sending snaps back and forth with someone. The record for the longest streak is currently 3,110 consecutive days.
In order to keep your streak alive, it’s important that you send at least one snap every 24 hours. This means that if you miss a day, your streak will end and you have to start over from day 1.
If your partner also misses a day (or more), then both of your streaks will end. In order to keep your streaks alive, make sure that both of you are committed to staying in touch daily, and don’t forget about birthdays.
It’s easy to forget these special dates when they fall outside of our regular schedule. It might be helpful to set reminders or simply send something extra special just because.
And remember: Snapstreaks aren’t forever; they’re meant to help you keep in touch with friends and family, not as an excuse to neglect them.
So don’t let it become a competition, it’s supposed to be fun.
How to make Snapchat shortcut for streaks 2023
In How to make Snapchat Shortcuts for streaks 2023, we will discuss how you can change or add your own shortcuts on your Snapchat app.
This is a recent feature that has been released in April 2019. On April 10th, they were finally able to release an update that allows users to customize their own shortcuts with eight new buttons!
This feature is currently only available for Android devices but soon will come out for IOS.
This means that if you have an android device, you can set up your own personalized Snapchat button for whatever purpose you want!
If you want to know how to do it, keep reading below. We’ll explain how to do it step by step so that you don’t get lost along the way.
Let’s start! How to make a Snapchat shortcut for streaks 2023:
You may want to see the video above if this doesn’t solve your problem
Step 1: Open your Snapchat application.
Step 2: Select the Menu Button from the top left corner of the screen.
Step 3: Then select Customize Your Shortcuts from the menu options.
Step 4: Then select Add Shortcut from the bottom right corner of the screen.
Step 5: Finally, press any one of 8 different spots on your phone (wherever you want).
That’s it! Now whenever you press that spot, it’ll open whatever you’ve assigned to it.
How easy was that? So what are you waiting for? Go ahead and try it now! It is fun and helpful at the same time. It gives you another reason to use Snapchat every day because now you can use your own shortcuts.
Once again, if you have any questions please feel free to ask us in the comments section below. Thanks for reading How to make a Snapchat shortcut for streaks 2023.
Frequently Asked Questions On How To Create A Shortcut On Snapchat
How do I use Snapchat story search?
The way Snapchat story search works is it lets you see all of your stories from your friends. This would be much easier than looking through their snaps individually.
If you want to be able to see your friends’ stories, follow these steps.
First, open up Snapchat and click on your profile picture at the top right corner.
Then click add friends and add people that you know have interesting stories.
After that go back to your profile page and scroll down until you see my story then tap on it and select who can view your story.
You can choose between only allowing specific people or everyone.
To make sure that people can view your story make sure they are following you by tapping following at the top left corner of their profile page.
If they aren’t following you then they won’t be able to see anything posted on your account.
Also, if someone has blocked you then they will not be able to view any of your content including stories!
Do we hope you found what you were looking for with this section of our article about how to use Snapchat story search?
How To Create A Shortcut On Snapchat 2023
How do I send my Snapchat story from my phone?
In order to send your Snapchat story from your phone, you must first download an app that lets you send your Snapchat story.
This way, when it is published, all of your viewers will be able to watch it.
To do so, follow these steps:
1) Go to Google Play Store or Apple App Store and search for Snapchat Story Sender. Download and install it on your phone.
2) Open up Snapchat Story Sender and sign in to your account by clicking Sign In at the top right corner of the screen.
3) Click Add Account at the bottom left corner of the screen, enter your username and password, then click Connect.
4) Click Publish Story at the top right corner of the screen and select how long you want people to see your story (1 hour, 1 day, or 7 days).
5) Click Publish Now. Your Snapchat story will now be sent out.
How to create a shortcut on Snapchat on iPhone
The first video in this article has already answered this question, so you may want to check it out by scrolling up.
How to delete a shortcut on Snapchat
Why would you want to delete a shortcut? There could be multiple reasons. For example, maybe you’re getting rid of some older friends and no longer find the relevant (or entertaining).
Or maybe it’s an old friend who posted something that really bothered you and you never want to see again.
If you know what icon was used for that person, using only your phone and not Snapchat’s website, you can remove it.
All you have to do is tap and hold down on their icon until they start wiggling, then tap delete at the bottom of their profile screen. It’s as easy as that!
But remember: deleting a shortcut doesn’t mean they’ll disappear from your list of contacts or from anyone else’s list, they’re still there, just hidden from view. The only way to make sure someone is gone forever is by unfriending them.
Where can I find people’s stories on Snapchat?
The best place to find people’s stories is through searching. On top of their user name, you can also search for hashtags such as #story or bestfriends.
If you’re in an event or an artist’s story, you’ll be able to view every single snap they’ve posted! It’s free and only takes seconds.
You can save them by tapping each snap that interests you, then click save (the disc icon). Once it saves, it will turn into a little ghost icon.
Simply swipe left and open up your saved stories. You can now look at anyone’s story whenever you want.
That way, if someone has a really good friend story going on with another person you follow, but you aren’t following either one of them directly, you still have access to it! So cool right?
How To Create A Shortcut On Snapchat
To re-watch any snaps on Snapchat:
Snapchat allows you to replay snaps. However, most people don’t know how to do it because there isn’t a replay button like there is when viewing Stories.
To replay any snap from someone’s Story, tap and hold on any photo until it enlarges.
Then tap on Replay in blue writing just below where you originally tapped on.
When viewing friends’ stories from Discover, tap and hold down on any photo until it enlarges; then tap Replay below where you originally tapped when viewing a Story.
After replaying once, you’ll see an arrow next to Replay that lets you keep replaying forever!
How many snaps can I send at once on Snapchat?
If you have kids or younger cousins, or even if you just want to put on a show for your friends, there’s something fun and exciting about sending as many snaps as possible at once.
The app actually has an upper limit of snaps that can be sent at once, right now it’s 16 Snaps.
Although it used to be higher than that (it was 64 back in 2013) they lowered it when they changed their logo and format last year.
Fortunately, with a little trickery, you can send almost anything at once. To get around the Snapchat limit, you’ll need to use what’s called a Third Party App.
A third-party app is basically any other application made by someone other than Snapchat. There are dozens of them out there, some good and some bad.
To find one that works best for you we recommend going to Google Play or iTunes store and searching Snapchat + Third-Party App.
Some will cost money but others are free so try them all out until you find one that works best for you! You may also consider looking into how to make a shortcut on Snapchat.
The benefits of having unlimited Snapchat features:
When you buy one of these apps, not only do you remove restrictions placed on users by Snapchat but you gain additional features too.
Most offer full access to stories and videos saved within your account; which means that instead of opening up your phone and watching them through Snapchat itself, they’ll play directly from within your app.
This makes it easy to quickly share stories between groups and individual contacts without having to go through Snapchat at all.
You’ll also have unlimited access to stickers available within their collections, which makes messaging more fun, especially if you’re trying to communicate something outside simple text like in a chat room or game setting.
How To View Snapchat Stories Without Them Knowing! (2023)
How long are videos stored on Snapchat?
Every snap sent or received by you will be temporarily stored on your device. However, they are not saved if you turn off your device’s internet connection before opening Snapchat again.
Saved stories from people you follow will be available for 24 hours after posting, or until they expire naturally.
After that point, you can’t watch them again and they’ll automatically disappear from your Recent Updates section of the Friends page.
If you’ve viewed someone’s story once, it won’t appear in your Recent Updates. All photos and videos sent within chats disappear as soon as both parties have left the conversation, whether intentionally or unintentionally. Unless either one of you takes a screenshot of it.
Where can I find people’s stories by category on Snapchat?
I want to be able to see everyone’s stories by category. I don’t care about their public story, just what they are posting privately on their personal friends list.
Is there any way for me to find all of that in one place? Like if I search, it will only show me public stories and not mine or my friends who have added me as a friend.
I would like to know where all these people hide so i can read them when they’re not around, lol.
How can I see other people’s stories, by category, without going through all their friend lists? Is there an archive somewhere?
Why can’t I add more than 100 users? What do you mean by adding more? Add them as friends or follow them?
If you mean follow, you should be able to follow anyone’s personal story (if they’ve added you) even if they aren’t following you back.
If you mean to add someone as a friend, then yes, I believe you can have up to 500+ friends but only 100 of those will appear on your profile page.
When does someone’s story expire on Snapchat?
What’s great about stories is that they are temporary, they only last 24 hours, or until your friends start ignoring them.
The downside of stories is that it makes you feel like you have to post and be engaging all day long, which can be hard and exhausting.
One way around feeling like you need to be posting all day long? Creating a scheduled story.
This means that your snap disappears after 24 hours, but you save time by not having to worry about posting constantly throughout the day.
Just set it up once and enjoy! You can do so by creating a new Story from your camera screen.
Tap Create Story at the top right corner of your screen, then tap Scheduled at the bottom left corner.
Choose when you want your story to end (24 hours later), then tap Next.
Select how many days you want it to run for (1-7), then tap Next.
Now add some snaps! When you’re done adding snaps, tap Done. Your story will now appear under Recent Updates on your profile page for anyone who follows you to see.
As many people know, Snapchat is one of those social media apps that have become extremely popular among teens and young adults because of its emphasis on privacy and anonymity.
There are many different ways to use it, so here are some tips for using it more effectively.
Step 1: Set up your privacy settings. The first thing you should do when using Snapchat is set up your privacy settings.
To do so, go to Settings and then tap Privacy. You can choose who can send you snaps by selecting between My Friends, which includes all contacts; My Friends Except.
which allows users to specify certain contacts they don’t want seeing their snaps; or Only Me, which means only you will be able to view your snaps.
You can also choose who can view your story by choosing between My Story or No One. If you select My Story, everyone will be able to view all of your past stories from today forward as well as any future stories. If you select No One, no one will be able to view any of your past or future stories.
If you want to follow someone on Snapchat, and they’re not following you back, then you can’t view their story.
This can be frustrating if you want to keep tabs on an individual or brand.
Well, don’t worry because there’s now a workaround! The easiest way around it is to create a friend who will only follow you.
In most cases, they won’t actually be able to see your story after that point unless you add them as another friend using your main account.
So let’s get started,
First of all go to settings, and accounts, and then click on Add Friends at the bottom of the screen.
Then select add by Snapcode option from the friends menu.
This is what your snapcode looks like: Then open up the Snapchat app and make sure you’re logged into your primary account.
Now go back to the Settings menu from where we were before and tap on Add Friends again but this time select Add by Snapcode option instead of adding a random number for example.
PEOPLE ALSO READ:
How To Create Instagram Memes For More Followers And Engagement